RasPi+IoTCoreでAzure IoT Edgeは動くのか!?→動かない
一般提供開始(GA)したAzure IoT Edgeが動作するOSの一覧がこれです。
マイクロソフトが正式にサポートするものがTier 1というカテゴリになっていて、
- 一般提供開始(GA)
- パブリックプレビュー
と、現時点で安心して使えるのはUbuntu Server 18.04/16.04とRaspbian-stretchだけのようです。用途によって注意が必要ですね。
ラズパイのWindows 10 IoT Coreでも動くのかな?
ということで、やってみることに。
環境
まだRasPi3B+、買っていないので、、、
Raspberry Pi Model B(RasPi3B)を使います。
Windows 10 IoT CoreのイメージをマイクロSDに書き込んで、RasPi3Bで起動。
OSバージョンはv.10.0.17134.1でした。Build 17134はVersion 1803なので、April 2018 updateに該当。(あぁ、ややこしい)

IoT Edgeサービスをインストール
手順はこちら。
おっと、いきなりPowerShell。
コンソール出し方を忘れた、、、のでググります。
これっぽい。
PowerShellを接続
PCでWindows PowerShellを管理者で実行してから、net start WinRMコマンドでWinRMサービスを有効にします。

良さげ。
Set-Item WSMan:\localhost\Client\TrustedHosts -Value 192.168.0.4コマンドでIoT Coreラズパイを信頼します。

Enter-PSSession -ComputerName 192.168.0.4 -Credential 192.168.0.4\AdministratorコマンドでIoT CoreラズパイのPowerShellに接続します。

繋がりました!
IoT Edgeサービスパッケージをダウンロード
手順に従って、バシバシとコマンドを実行します。
Invoke-WebRequest https://aka.ms/iotedged-windows-latest -o .\iotedged-windows.zip
Expand-Archive .\iotedged-windows.zip C:\ProgramData\iotedge -f
Move-Item c:\ProgramData\iotedge\iotedged-windows\* C:\ProgramData\iotedge\ -Force
rmdir C:\ProgramData\iotedge\iotedged-windows
$env:Path += ";C:\ProgramData\iotedge"
SETX /M PATH "$env:Path"

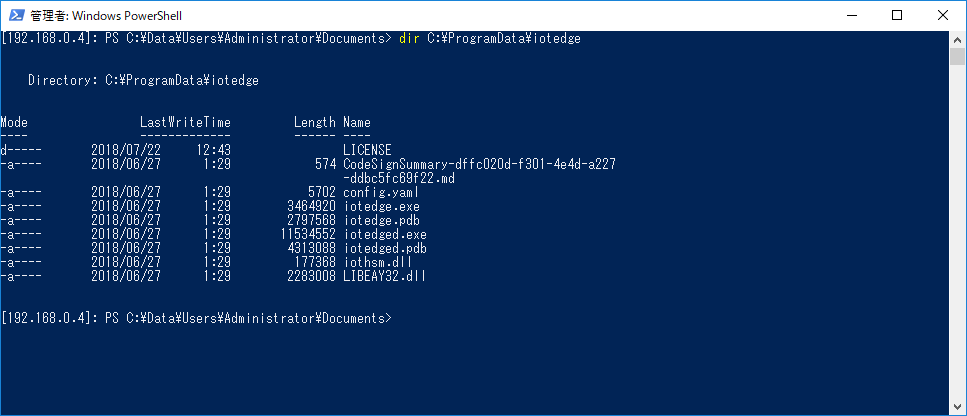
C:\ProgramData\iotedgeフォルダに放り込んだみたいなので確認すると、iotedgeやiotedged(デーモンかな?)が入っていました。
vcruntimeをインストール
手順に従って(ry
Invoke-WebRequest -useb https://download.microsoft.com/download/0/6/4/064F84EA-D1DB-4EAA-9A5C-CC2F0FF6A638/vc_redist.x64.exe -o vc_redist.exe
.\vc_redist.exe /quiet /norestart

vc_redistを実行したところでエラー。
OSプラットフォームが違うぞコラ!ってことですが、、、
よく見ると、ダウンロードしているファイル名がvc_redist.x64.exeとx64ぽい。
途中経過
現時点は動かない。
なんとなく予想はしていたが、、、ArmのIoTCoreは対応していないんだろうか??
一般提供開始(GA)したAzure IoT Edgeをインストールしてみた
6/27にAzure IoT EdgeがGA(一般提供開始)しましたが、なかなかまとまった時間が取れず、、、3週間ほど遅れましたが、動かしてみました。というか、入れてみました程度。
みんな大好きラズパイで試すことにします。
最新はRaspberry Pi Model B+(RasPi3B+)ですが、今回は少しスペックの低いRaspberry Pi Model B(RasPi3B)で。
深い理由があるわけではなく、、、まだRasPi3B+、買っていないものですから。(焦
RasPi3B + Raspbian
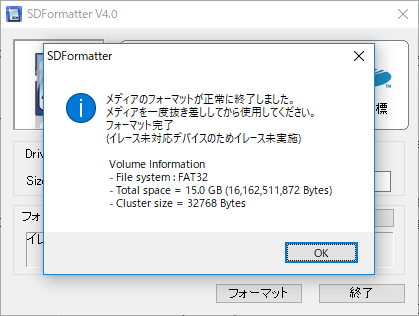
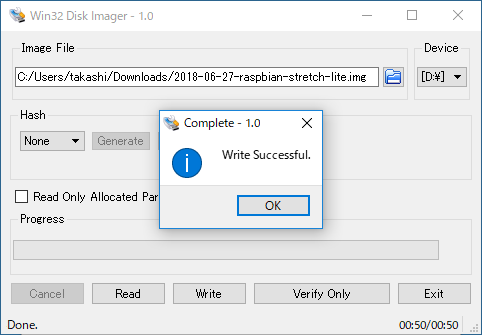
いつものように、マイクロSDをSDFormatterでイレースしてから、Win32DiskImagerでRaspbianイメージをマイクロSDに書き込みます。
Raspbianイメージは現時点最新のLite、2018-06-27-raspbian-stretch-lite.imgにしました。
あと、忘れずにbootにsshファイルを作っておきます。 Raspbian起動後、パソコンのTeraTermからSSH接続で操作したいので。
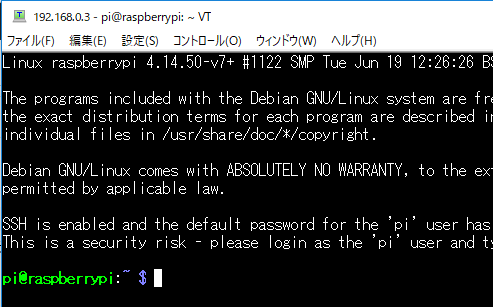
RasPiにマイクロSDを差して起動、無事、TeraTermから接続できました。
この時点のディスク使用量はこちら。
$ df -k
Filesystem     1K-blocks    Used Available Use% Mounted on
/dev/root       15471088 1072076  13737812   8% /
devtmpfs          470116       0    470116   0% /dev
tmpfs             474724       0    474724   0% /dev/shm
tmpfs             474724    6300    468424   2% /run
tmpfs               5120       4      5116   1% /run/lock
tmpfs             474724       0    474724   0% /sys/fs/cgroup
/dev/mmcblk0p1     43539   22192     21347  51% /boot
tmpfs              94944       0     94944   0% /run/user/1000
IoT Edgeランタイムをインストール
最初にやるべきチュートリアルはこちら。クイックスタート。
LinuxとWindowsの2種類あるので、Linuxの方を参照します。
本文にも書かれていますが、IoT Edgeラインタイムをインストールする部分はUbuntu 16.04を想定して書かれています。
RasPiの手順はこちらです。
手順に沿ってコマンドを実行していきましょう。
mobyのエンジンとCLIをインストールします。(CLIは必須ではありません。)
$ curl -L https://aka.ms/moby-engine-armhf-latest -o moby_engine.deb && sudo dpkg -i ./moby_engine.deb
$ curl -L https://aka.ms/moby-cli-armhf-latest -o moby_cli.deb && sudo dpkg -i ./moby_cli.deb
$ sudo apt-get install -f
次に、IoT Edgeセキュリティデーモンをインストールします。
(これ、Previewのときは無かったような)
$ curl -L https://aka.ms/libiothsm-std-linux-armhf-latest -o libiothsm-std.deb && sudo dpkg -i ./libiothsm-std.deb
$ curl -L https://aka.ms/iotedged-linux-armhf-latest -o iotedge.deb && sudo dpkg -i ./iotedge.deb
$ sudo apt-get install -f
IoT Edgeランタイムをセットアップ
/etc/iotedge/config.yamlの<ADD DEVICE CONNECTION STRING HERE>に、IoT Hubに作成したIoT Edgeの接続文字列(Connection string)を記入して、IoT Edgeセキュリティデーモンを再起動します。
$ sudo vi /etc/iotedge/config.yaml
$ sudo systemctl restart iotedge
この時点のディスク使用量はこちら。
$ df -k
Filesystem     1K-blocks    Used Available Use% Mounted on
/dev/root       15471088 1328336  13481552   9% /
devtmpfs          470116       0    470116   0% /dev
tmpfs             474724       0    474724   0% /dev/shm
tmpfs             474724    6324    468400   2% /run
tmpfs               5120       4      5116   1% /run/lock
tmpfs             474724       0    474724   0% /sys/fs/cgroup
/dev/mmcblk0p1     43539   22192     21347  51% /boot
tmpfs              94944       0     94944   0% /run/user/1000
IoT Edgeランタイムの稼働確認
いくつかのコマンドで、IoT Edgeランタイムの稼働状況を確認することができます。
| コマンド | 説明 |
|---|---|
| systemctl status iotedge | IoT Edgeデーモンの稼働状況 |
| sudo iotedge list | 稼働しているIoT Edgeモジュールの一覧 |
| sudo iotedge logs edgeAgent | IoT Edgeエージェントのログ表示 |
従来の(?)、Dockerコマンドも使えます。
$ sudo docker ps
CONTAINER ID        IMAGE                                      COMMAND                   CREATED             STATUS              PORTS               NAMES
ffca46f992c6        mcr.microsoft.com/azureiotedge-agent:1.0   "/bin/sh -c 'echo \"$…"   7 minutes ago       Up 7 minutes                            edgeAgent
$ sudo docker images
REPOSITORY                             TAG                 IMAGE ID            CREATED             SIZE
mcr.microsoft.com/azureiotedge-agent   1.0                 b4496705558b        2 weeks ago         229MB
まとめ
.NET Core 2.1 SDKをRaspberry Pi 3で動かしてみた
.NET Core SDKがRaspberry Piに対応したようなので試してみました。
ラズパイとOS
サポートしているのはRaspberry Pi 2以降で、ARMv6を使ったRaspberry Pi ZeroシリーズはNG。
また、Release NotesにあるSupported OS versionsのLinuxを見ると、Debian 9 / Ubuntu 18.04 のようです。
なので、
- Raspberry Pi3 Model B
- Ubuntu 18.04
でやってみることにしました。
OSインストール
ラズパイ向けのUbuntu 18.04イメージはUbuntu公式からは配布されていないようです。orz
ここに手間をかけたくないなぁ、、、ということで探し回ってみたところ、ここにありました。感謝。
SDFormatterで削除したマイクロSDに、Win32DiskImagerでubuntu-18.04-preinstalled-server-armhf+raspi3.img.xzを書き込んで、ラズパイで起動します。
起動時にサービスがFailしているような、、、気がしましたが、見なかったことにw
無事、OSが動きだしました。
ubuntu@ubuntu:~$ uname -a
Linux ubuntu 4.15.0-1010-raspi2 #11-Ubuntu SMP PREEMPT Tue Apr 24 06:27:17 UTC 2018 armv7l armv7l armv7l GNU/Linux
ubuntu@ubuntu:~$
.NET Core SDKインストール
Installing .NET Core on LinuxのUbuntu 18.04のとおりコマンドを実行します。
ubuntu@ubuntu:~$ wget -qO- https://packages.microsoft.com/keys/microsoft.asc | gpg --dearmor > microsoft.asc.gpg
ubuntu@ubuntu:~$ sudo mv microsoft.asc.gpg /etc/apt/trusted.gpg.d/
ubuntu@ubuntu:~$ wget -q https://packages.microsoft.com/config/ubuntu/18.04/prod.list
ubuntu@ubuntu:~$ sudo mv prod.list /etc/apt/sources.list.d/microsoft-prod.list
ubuntu@ubuntu:~$
ubuntu@ubuntu:~$ sudo apt-get install apt-transport-https
Reading package lists... Done
Building dependency tree
Reading state information... Done
The following NEW packages will be installed:
  apt-transport-https
0 upgraded, 1 newly installed, 0 to remove and 81 not upgraded.
Need to get 1692 B of archives.
After this operation, 152 kB of additional disk space will be used.
Get:1 http://ports.ubuntu.com/ubuntu-ports bionic/universe armhf apt-transport-https all 1.6.1 [1692 B]
Fetched 1692 B in 1s (2880 B/s)
Selecting previously unselected package apt-transport-https.
(Reading database ... 61793 files and directories currently installed.)
Preparing to unpack .../apt-transport-https_1.6.1_all.deb ...
Unpacking apt-transport-https (1.6.1) ...
Setting up apt-transport-https (1.6.1) ...
ubuntu@ubuntu:~$ sudo apt-get update
Get:1 https://packages.microsoft.com/ubuntu/18.04/prod bionic InRelease [2846 B]
Hit:2 http://ppa.launchpad.net/ubuntu-raspi2/ppa-rpi3/ubuntu bionic InRelease
Hit:3 http://ports.ubuntu.com/ubuntu-ports bionic InRelease
Hit:4 http://ports.ubuntu.com/ubuntu-ports bionic-updates InRelease
Get:5 https://packages.microsoft.com/ubuntu/18.04/prod bionic/main amd64 Packages [10.1 kB]
Hit:6 http://ppa.launchpad.net/ubuntu-raspi2/ppa/ubuntu bionic InRelease
Hit:7 http://ports.ubuntu.com/ubuntu-ports bionic-backports InRelease
Hit:8 http://ports.ubuntu.com/ubuntu-ports bionic-security InRelease
Fetched 13.0 kB in 5s (2569 B/s)
Reading package lists... Done
ubuntu@ubuntu:~$ sudo apt-get install dotnet-sdk-2.1
Reading package lists... Done
Building dependency tree
Reading state information... Done
E: Unable to locate package dotnet-sdk-2.1
E: Couldn't find any package by glob 'dotnet-sdk-2.1'
E: Couldn't find any package by regex 'dotnet-sdk-2.1'
ubuntu@ubuntu:~$
E: Unable to locate package dotnet-sdk-2.1と、dotnet-sdk-2.1が見つからないエラーになってしまいました。
ログを見ると気になる表記が。
Get:5 https://packages.microsoft.com/ubuntu/18.04/prod bionic/main amd64 Packages [10.1 kB]
おや?
cat /etc/apt/sources.list.d/microsoft-prod.list
deb [arch=amd64] https://packages.microsoft.com/ubuntu/18.04/prod bionic main
おやおや??
仕組みを理解しないまま、漁ってみるが、、、
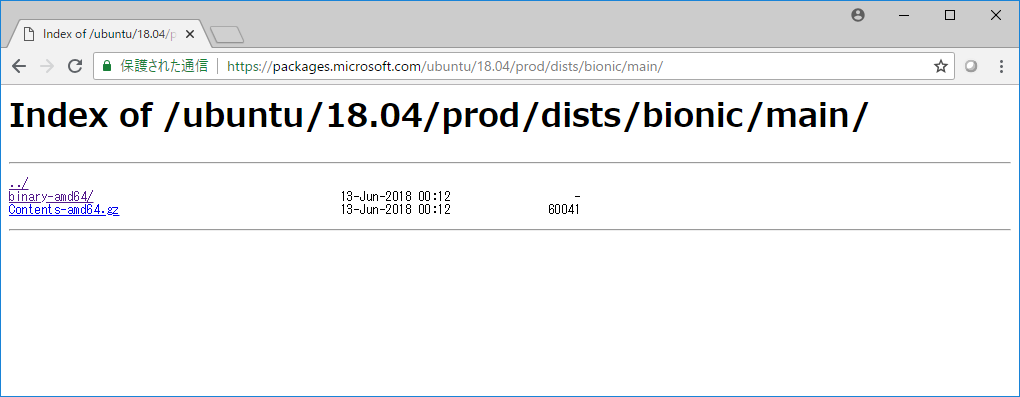

arm向けのパッケージが見つからない。
どうやら、リポジトリにアップされていないようなので、、、
バイナリをダウンロードして、Installing .NET Core on LinuxのInstallation from a binary archiveのとおり、解凍とパス設定しました。
ubuntu@ubuntu:~$ wget https://download.microsoft.com/download/8/8/5/88544F33-836A-49A5-8B67-451C24709A8F/dotnet-sdk-2.1.300-linux-arm.tar.gz
ubuntu@ubuntu:~$ mkdir -p $HOME/dotnet && tar zxf dotnet-sdk-2.1.300-linux-arm.tar.gz -C $HOME/dotnet
ubuntu@ubuntu:~$ export PATH=$PATH:$HOME/dotnet
dotnetコマンドが使えるか確認。
ubuntu@ubuntu:~$ dotnet

Usage: dotnet [options]
Usage: dotnet [path-to-application]

Options:
  -h|--help         Display help.
  --info            Display .NET Core information.
  --list-sdks       Display the installed SDKs.
  --list-runtimes   Display the installed runtimes.

path-to-application:
  The path to an application .dll file to execute.
ubuntu@ubuntu:~$ cd
ubuntu@ubuntu:~$ dotnet

Usage: dotnet [options]
Usage: dotnet [path-to-application]

Options:
  -h|--help         Display help.
  --info            Display .NET Core information.
  --list-sdks       Display the installed SDKs.
  --list-runtimes   Display the installed runtimes.

path-to-application:
  The path to an application .dll file to execute.
ubuntu@ubuntu:~$
サンプルプログラムを実行してみる
ここの2. Create your appと3. Run your appをやってみます。
ubuntu@ubuntu:~$ dotnet new console -o myApp
The template "Console Application" was created successfully.

Processing post-creation actions...
Running 'dotnet restore' on myApp/myApp.csproj...
  Restoring packages for /home/ubuntu/myApp/myApp.csproj...
  Installing Microsoft.NETCore.DotNetAppHost 2.1.0.
  Installing Microsoft.NETCore.DotNetHostResolver 2.1.0.
  Installing Microsoft.NETCore.DotNetHostPolicy 2.1.0.
  Installing NETStandard.Library 2.0.3.
  Installing Microsoft.NETCore.Targets 2.1.0.
  Installing Microsoft.NETCore.Platforms 2.1.0.
  Installing Microsoft.NETCore.App 2.1.0.
  Generating MSBuild file /home/ubuntu/myApp/obj/myApp.csproj.nuget.g.props.
  Generating MSBuild file /home/ubuntu/myApp/obj/myApp.csproj.nuget.g.targets.
  Restore completed in 15.86 sec for /home/ubuntu/myApp/myApp.csproj.

Restore succeeded.

ubuntu@ubuntu:~$ cd myApp
ubuntu@ubuntu:~/myApp$ cat Program.cs
using System;

namespace myApp
{
    class Program
    {
        static void Main(string[] args)
        {
            Console.WriteLine("Hello World!");
        }
    }
}
ubuntu@ubuntu:~/myApp$ dotnet run
Hello World!
ubuntu@ubuntu:~/myApp$
おぉー
動いた♪
動いたけど、、、起動するまでに結構時間かかるなぁw
de:code 2018 に参加しました
5/22~23に開催された、de:code 2018にいろいろな立場で参加しました。
(有料イベントのため、発表内容の詳細は伏せます。)
Azure Sphere開発のデモ
4月のRSA Conferenceにマイクロソフトから突如発表された、Microsoft Azure Sphere。
SeeedはAzure Sphereのエコシステムパートナーということもあり、、、ブレイクアウトセッションで開発環境のデモンストレーションをしました。
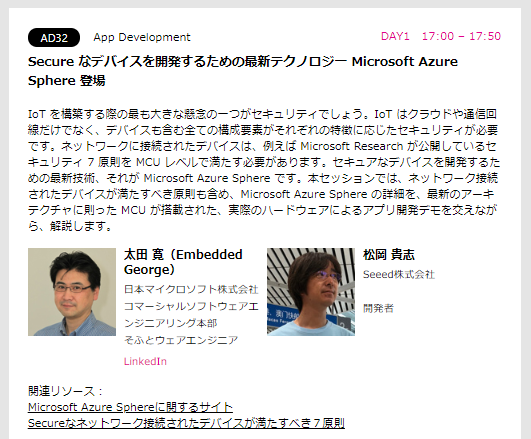
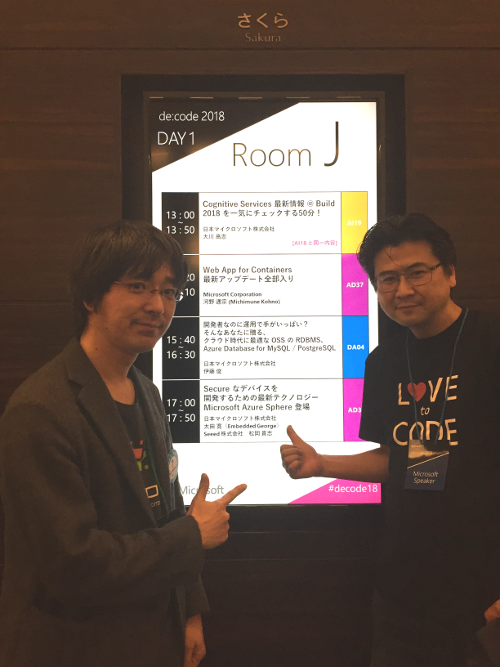
後日、動画公開予定?
MVPパーソナルスポンサー
MVP事務局からMVP方々へ「セッションに関連するサンプルコードもしくはツールを公開したいので協力してちょ。」(意訳)という依頼があり、これは素晴らしい!ぜひとも協力せねばいかん!!と発起、セッションAD22のサンプルを申し込みして審査が通ったので、micro:bitとIoT Edge v2を連携するサンプルコードとドキュメントを提供しました。
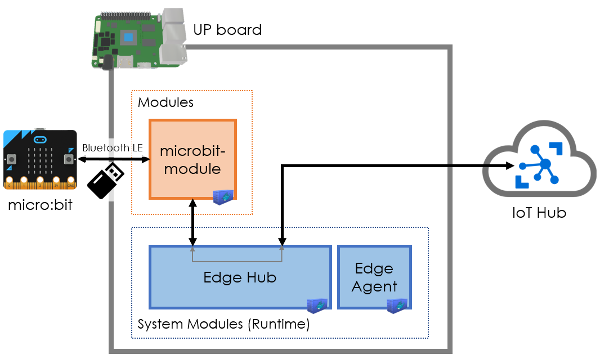
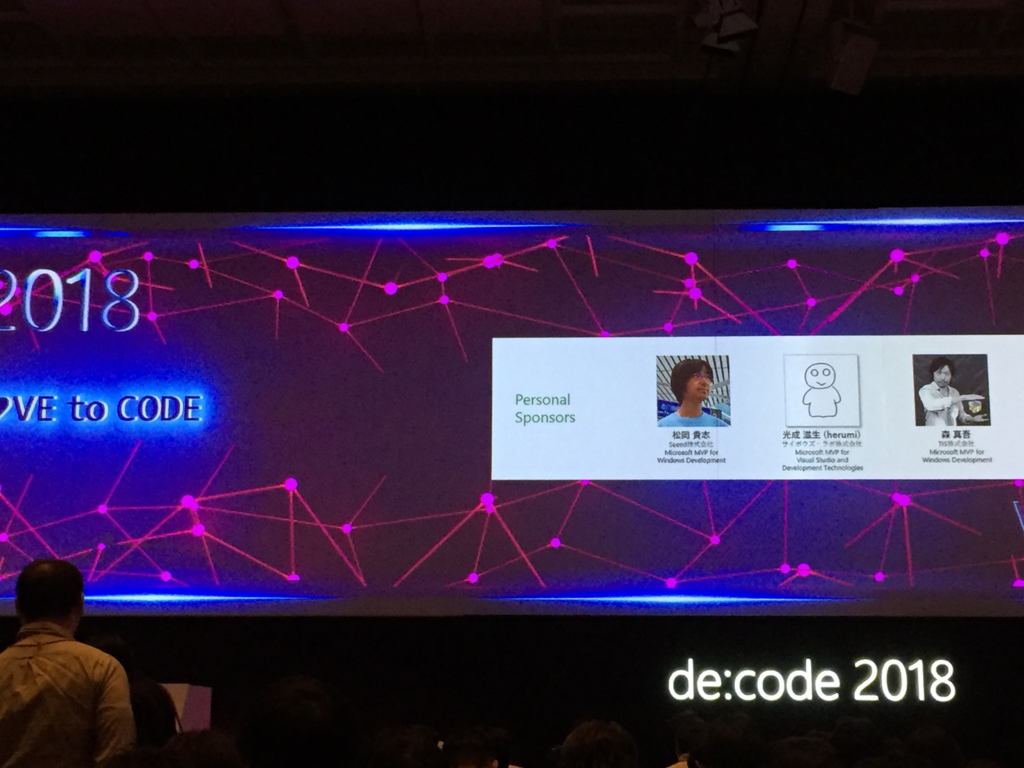
当面、de:code参加者だけに公開。(de:code事務局からメールが出ている)
基調講演デモのお手伝い
セッションAD22を担当していたのがさっくるさんですが、基調講演のデモをすることになり、なんか成り行きで後方支援することになりました。(進捗確認とか、進捗確認など)
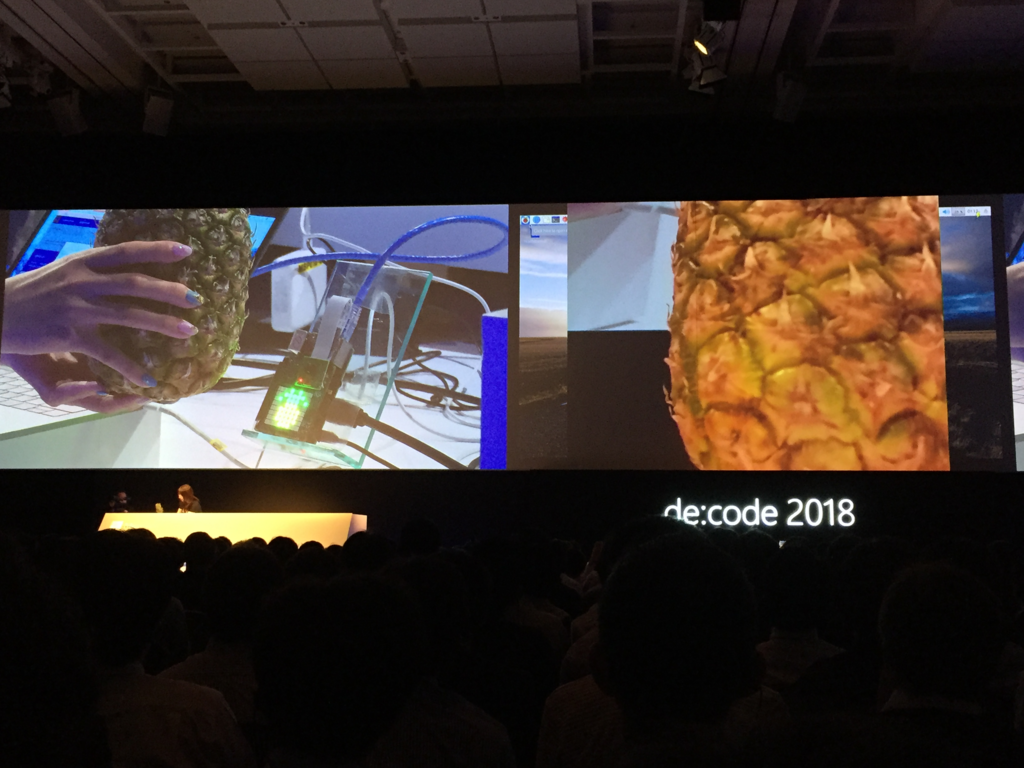
感じたこと
- 基調講演デモ、ちゃんと動くか心配で胃が痛かった。(いらぬ心配をしてしまったようだ...)
- Sphereデモ、いろいろ心配していたけど、とても楽しかった。デモ動いたときに拍手もらえるとか感激。またやりたい。
- IoTEdgeV2サンプルとドキュメント、ものすごく大変でした。もうね、2ヵ月くらい毎晩やり続けていた。おかげでIoTEdgeV2かなり詳しくなった。ドキュメント力は相変わらず低迷。
- 開発者(関係者、参加者)の交流が希薄。フルタイム、セッションを聞くことが目的になってしまっているのではないだろうか。
iotedge-scott-or-notを動かす
//Build 2018のVision Keynoteで、Custom VisionをRaspberry Piで動かしてScottかどうかを判定するデモ、Scott or notのソースが公開されていたので動かしてみたところ、いくつかハマり所があったので書いておきます。
デモのソース
デモのソースはgithubにアップされています。
modules配下にあるAzureFunctionContainer、CustomVisionContainer、StartupContainerの3つが、IoT Edgeで動かすモジュールです。それぞれのフォルダにDockerイメージを作るためのDockerfileとAzureIoTEdge拡張が使用するmodule.jsonがあります。
templates配下には、AzureIoTEdge拡張が使用するRaspberry Pi用とWindows用のdeployment.template.jsonがあります。
[RasPi] IoT Edgeの準備
ハードウェアは、Raspberry Pi 3 BにSense HATとカメラモジュールV2です。
ディスプレイは必須ではありませんが、カメラが撮影した画像が確認できるので、接続しておいたほうが良いです。
OSは、8GBのマイクロSDに2018-04-18-raspbian-stretch-lite.imgを書き込みます。ついでに、boot配下にsshファイルを作っておくと、sshが有効になるので少し便利です。
raspi-configを起動して、カメラとI2Cを有効化、カメラのパッケージをインストールして再起動します。
$ sudo raspi-config
5 Interfacing Options -> P1 Camera
5 Interfacing Options -> P5 I2C
そして、こちらの記事のStep 2からStep 5を実施します。
必要に応じて、Azure Container Registryの認証情報を設定しておきましよう。
$ sudo iotedgectl login --address decodecr.azurecr.io --username decodecr --password (password)
★追加作業
RTIMULibをホストに入れておかないと後々でエラーになるので、pipでインストールします。モジュールからファイル名指定で参照するので、バージョンを指定するようにしましょう。
$ sudo pip install RTIMULib==7.2.1b1
[PC] 開発環境の準備
わたしの開発環境は、すでに諸々インストールされているので確認できませんが、たぶん下記をインストールすればOKです。
- Visual Studio Code
- Azure IoT Edge extension for Visual Studio Code
- Docker
あと、githubからソースをクローンする場合は、Git for Windowsも必要です。(zip形式でダウンロード、解凍する場合は不要です。)
gitコマンドでソースを開発環境にクローンします。
C:\Users\takashi\Desktop>git clone https://github.com/Azure-Samples/iotedge-scott-or-not.git
Cloning into 'iotedge-scott-or-not'...
remote: Counting objects: 65, done.
remote: Total 65 (delta 0), reused 0 (delta 0), pack-reused 65
Unpacking objects: 100% (65/65), done.
★追加作業
StartupContainerモジュールの/usr/lib/python2.7/dist-packages参照がさまざまな問題を引き起こします。(ImportError: No module named requests等)
問題を回避するために、createOptionsを下記に変更しておきましょう。
"createOptions": "{\"Env\": [\"DEVICE=RPI\", \"AZURE_ML_HOSTNAME=CustomVisionContainer\"],\"HostConfig\": { \"Binds\": [\"/home/pi/image:/home/pi/image\", \"/dev:/dev\", \"/usr/local/lib/python2.7/dist-packages/RTIMU.so:/usr/local/lib/python2.7/dist-packages/RTIMU.so\", \"/usr/local/lib/python2.7/dist-packages/RTIMULib-7.2.1b1.dist-info:/usr/local/lib/python2.7/dist-packages/RTIMULib-7.2.1b1.dist-info\" ], \"Privileged\": true, \"PortBindings\":{\"8082/tcp\":[{\"HostPort\":\"8082\"}]}}}"
[PC] モジュールのDockerイメージをアップロード
templates\raspberry pi\deployment.template.jsonをルートフォルダにコピーします。
C:\Users\takashi\Desktop>cd iotedge-scott-or-not

C:\Users\takashi\Desktop\iotedge-scott-or-not>copy "templates\raspberry pi\deployment.template.json" .
        1 個のファイルをコピーしました。
modules\AzureFunctionContainer\module.json、modules\CustomVisionContainer\module.json、modules\StartupContainer\module.json内の[registry]を、Azure Container Registryのログインサーバー名に変更します。
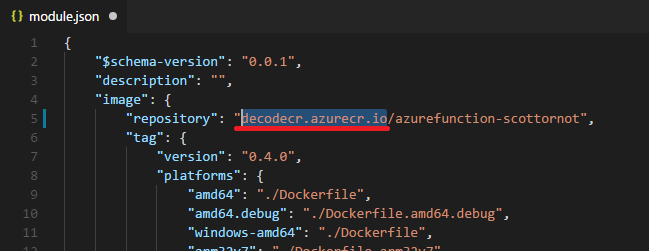
AzureFunctionContainerには、Logic Appの呼び出しコードが含まれています。Logic Appを用意するのが手間なので、この部分をコメントにします。
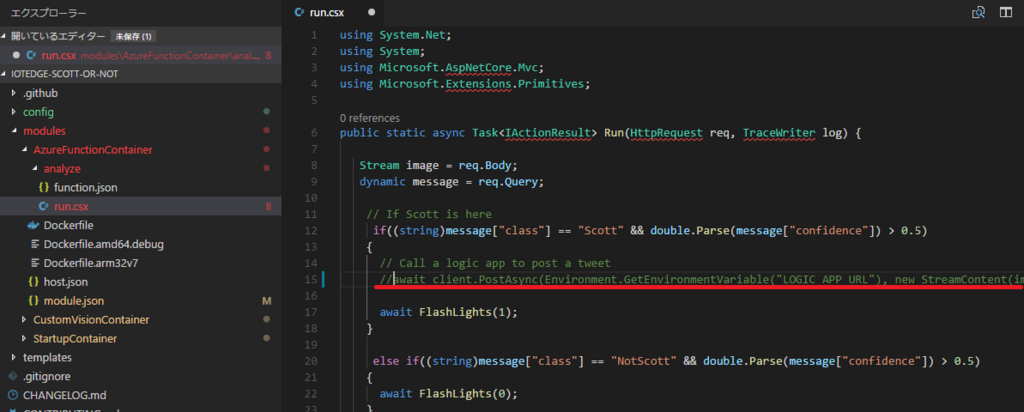
ルートフォルダにあるdeployment.template.jsonを右クリックしてBuild IoT Edge Solutionを選択すると、Dockerイメージを作成、Azure Container Registryにアップロードします。

[PC] IoT Edgeにモジュールを追加
IoT HubのIoT Edgeを設定して、モジュールのダウンロード、実行を指示します。
これらは、開発環境のVisual Studio Codeから設定することができます。
ルートフォルダにあるdeployment.template.jsonを右クリックしてGenerate IoT Edge Deployment Manifestを選択します。すると、config\deployment.jsonというファイルが作成されます。
config\deployment.jsonを右クリックしてCreate Deployment for IoT Edge Deviceを選択、一覧表示されたIoT Edgeから設定先を選択すると、IoT HubのIoT Edgeにモジュールのダウンロード、実行が指示されます。

[RasPi] IoT Edgeを起動
$ sudo iotedgectl start
感想
- IoT Edge extension for Visual Studio Code、まぁ便利。
- とはいえ、このExtensionを過信してはいけない。(Arm/x64問題勃発)
- RasPiのDockerイメージをWindows x64で作成しようとする行為が問題を増している。(RasPiで作成するなら、DockerイメージにRTIMULibを加えるだけなのに...)
Custom Vision on IoT Edge v2 (Docker) on Raspberry Pi
この記事の続きです。
前回は、Custom VisionのClassificationをDockerFileエクスポートして、UPボード(Ubuntu Server 16.04)で動かしました。今回は、このDockerFileエクスポートをRaspberry Pi 3 Model Bで動かしてみます。
RaspbianとDockerをインストール
過去記事のStep 1からStep 4までを実施して、Raspberry PiにRaspbianとDockerをインストールします。
過去記事のときのRaspbianは2018-03-13-raspbian-stretch-lite.imgでしたが、現在の最新は2018-04-18-raspbian-stretch-lite.imgなので、最新を使ってください。
なお、インストールされたDockerのバージョンは18.05.00でした。
$ docker --version
Docker version 18.05.0-ce, build f150324
DockerでCustomVisionを起動
Custom VisionでDockerFileエクスポートしたzipファイルをRaspberry Piにコピー、解凍して、docker buildします。
(やっぱりDockerFileはDockerfileにリネームが必要でした。)
すると、、、
No matching distribution found for tensorflow==1.5.0というエラーが発生して死亡orz

PyPIのtensorflow 1.5.0にarmのパッケージがアップされていないのが原因のようです。
Dockerfileとrequirements.txt
//Build2018 Vision Keynoteのscott-or-notのソースがgithubに公開されている情報をキャッチしていたので、それを丸写しに参考にDockerfileとapp/requirements.txtを書きかえてみました。
さっくるさん情報。アンテナはっておくの大事ですねw
先程のbuildのIoT Edgeのデモのscott-or-notのアプリの作り方です。ラズパイでCustom Visionのモデルを使ったローカル画像認識が簡単にできるようになりました(`・∀・´) #msbuild https://t.co/k4qUjTAcGq
— さっくる / Saki (@sakkuru) 2018年5月7日
で、書き換えたDockerfileとapp/requirements.txtはこちら。
Dockerfile
FROM resin/rpi-raspbian:jessie

ADD app /app

# Install dependencies
RUN apt-get update && apt-get install -y \
        python3 \
        python3-pip \
        wget \
        build-essential \
        libjpeg-dev \
        python3-dev \
        zlib1g-dev

RUN pip3 install --upgrade pip
RUN pip install --upgrade setuptools
RUN pip install -r /app/requirements.txt
RUN pip install http://ci.tensorflow.org/view/Nightly/job/nightly-pi-python3/179/artifact/output-artifacts/tensorflow-1.7.0-cp34-none-any.whl

# Expose the port
EXPOSE 80

# Set the working directory
WORKDIR /app

# Run the flask server for the endpoints
CMD python3 app.py
app/requirements.txt
requests
Pillow
Flask
numpy
DockerでCustomVisionを起動(2回目)
動いたー!
$ docker build -t wio-module .
$ docker images
REPOSITORY           TAG                 IMAGE ID            CREATED             SIZE
wio-module           latest              6cc21d1089d4        7 seconds ago       739MB
resin/rpi-raspbian   jessie              248c8313f621        3 days ago          126MB
$ docker run -p 127.0.0.1:80:80 -d wio-module
5d455f69689c03de931e5168d938690a7e50b9563dfdf2e8c0aea7a7151e8e59
画像を投げてみる。
$ time curl -X POST http://127.0.0.1/image -H "Content-Type: application/octet-stream" --data-binary @IMG_0015.JPG
{"created":"2018-05-12T15:47:10.400908","id":"","iteration":"","predictions":[{"boundingBox":null,"probability":0.9996511936187744,"tagId":"","tagName":"Wio LTE"}],"project":""}

real    0m3.353s
user    0m0.031s
sys     0m0.040s
$ docker logs 5d455f69689c
Loading model...Success!
Loading labels...2 found. Success!
 * Serving Flask app "app" (lazy loading)
 * Environment: production
   WARNING: Do not use the development server in a production environment.
   Use a production WSGI server instead.
 * Debug mode: off
 * Running on http://0.0.0.0:80/ (Press CTRL+C to quit)
172.17.0.1 - - [12/May/2018 15:47:01] "POST /image HTTP/1.1" 200 -
メモリ使用量は、、、なんか表示されないなぁ。
$ docker stats 5d455f69689c
CONTAINER ID        NAME                   CPU %               MEM USAGE / LIMIT   MEM %               NET I/O             BLOCK I/O           PIDS
5d455f69689c        practical_mcclintock   0.04%               0B / 0B             0.00%               3.07MB / 12.6kB     13.6MB / 0B         0
感想
- CustomVision、Raspberry Piでも動いた。
- 環境構築に時間がかかった。すんなりできてもトータル2時間くらい?
Custom Vision on IoT Edge v2 (Docker)
いままでCustom Visionにはあまり興味が無かったのですが、Build 2018のVision KeynoteでCustom VisionをIoT Edge v2(Docker)で動かしていたようなので試してみました。
Custom Vision
データの用意が簡単そうな、Classificationでやってみることに。compactじゃないと後でDockerfileにエクスポートできないようなので、‘General(compact)`を選びます。
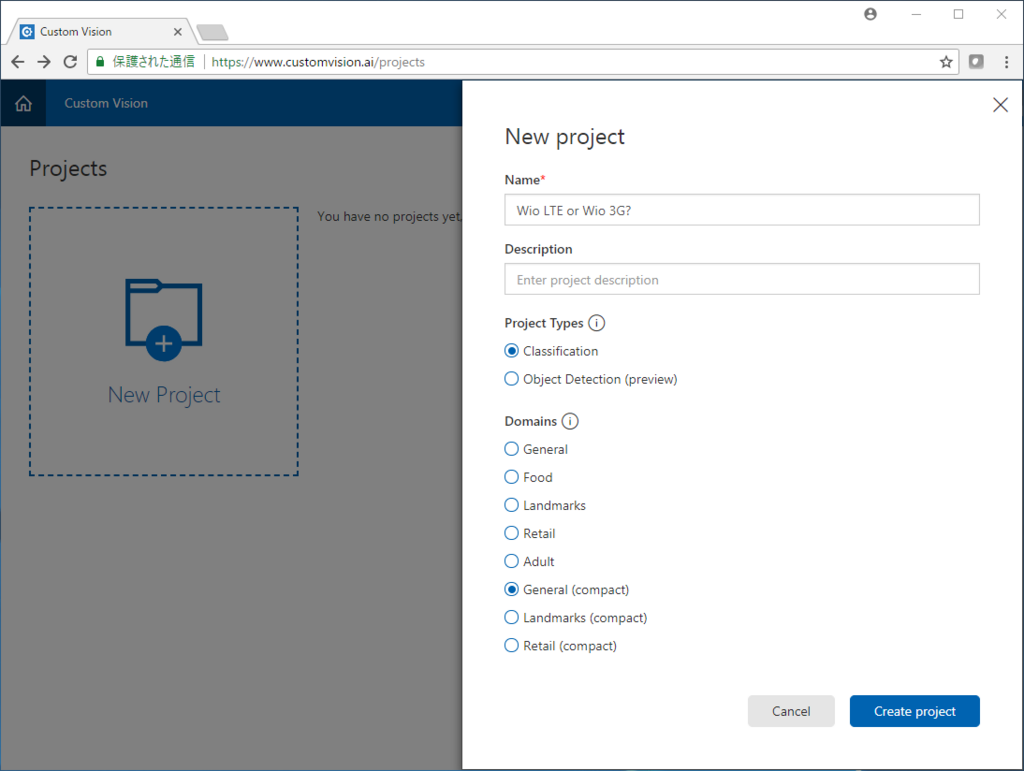
手元に使えそうな、、、Wio LTEとWio 3Gの写真があったのでこれを買いました。
Custom Visonは初めてですが、なんとなくポチポチすれば大丈夫な感じですw
それぞれの写真にWio LTEもしくはWio 3Gのタグを付けます。
どうやら、各タグに最低5枚の写真を用意しなければいけないようです。
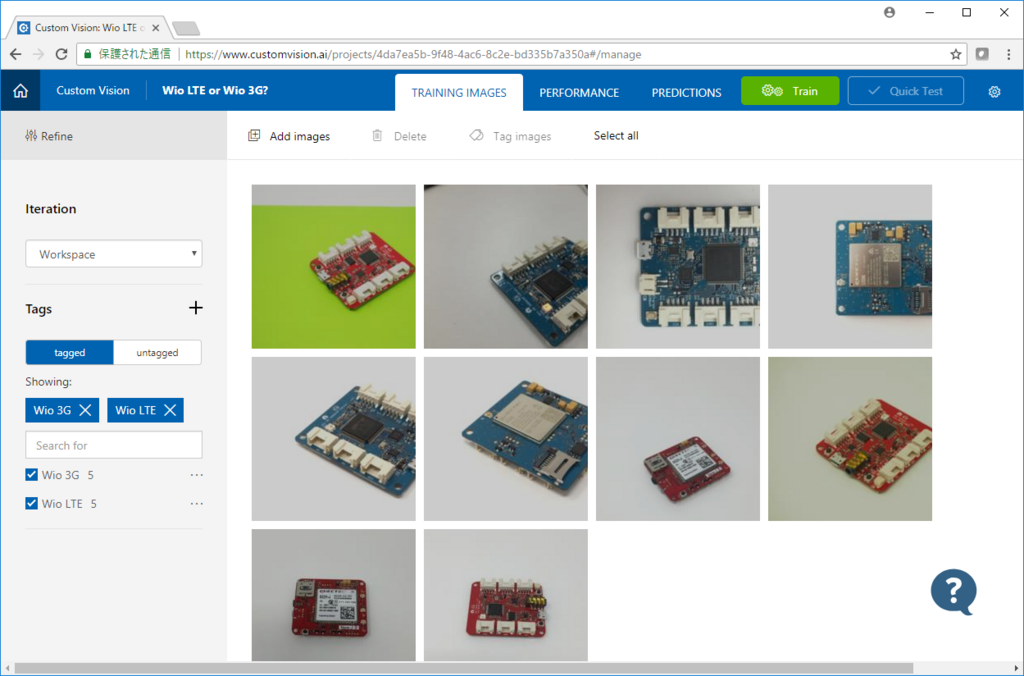
で、Trainをポチっと。
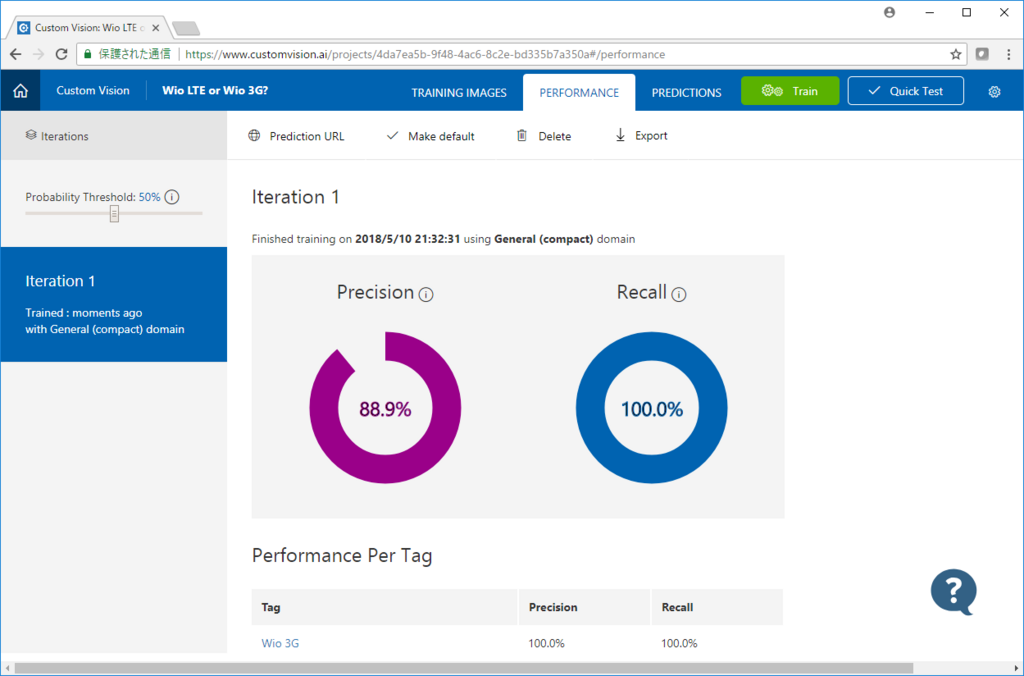
なんか出来たっぽい♪
Quick Testで、アップしていない画像をテストしてみます。
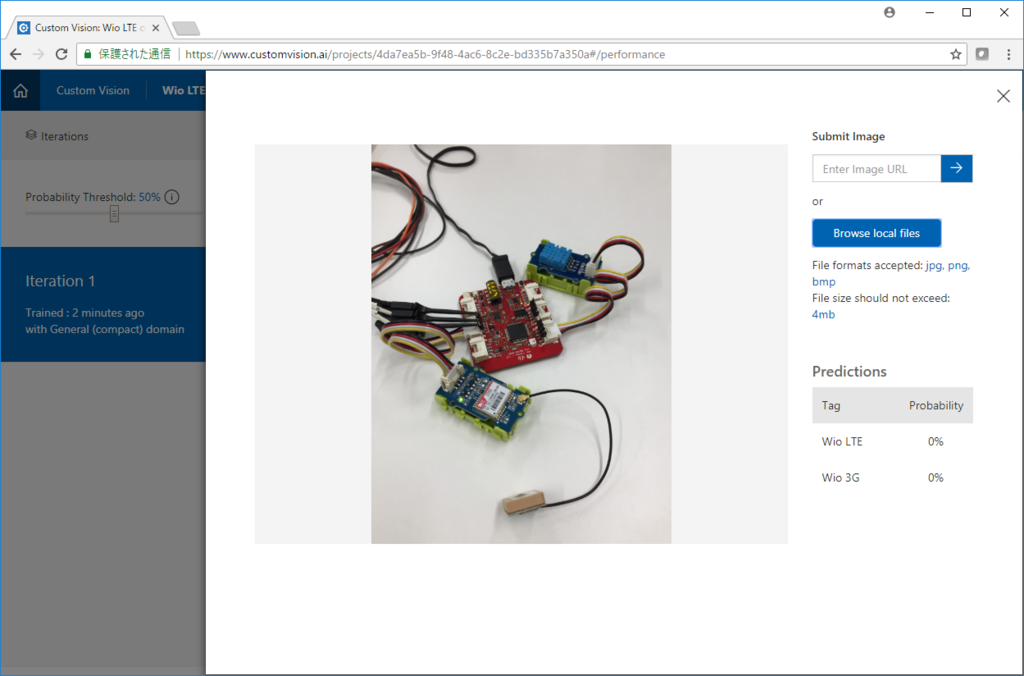
あれ?
どちらも0%だと。
気を取り直して、条件良さそうな画像でテスト。
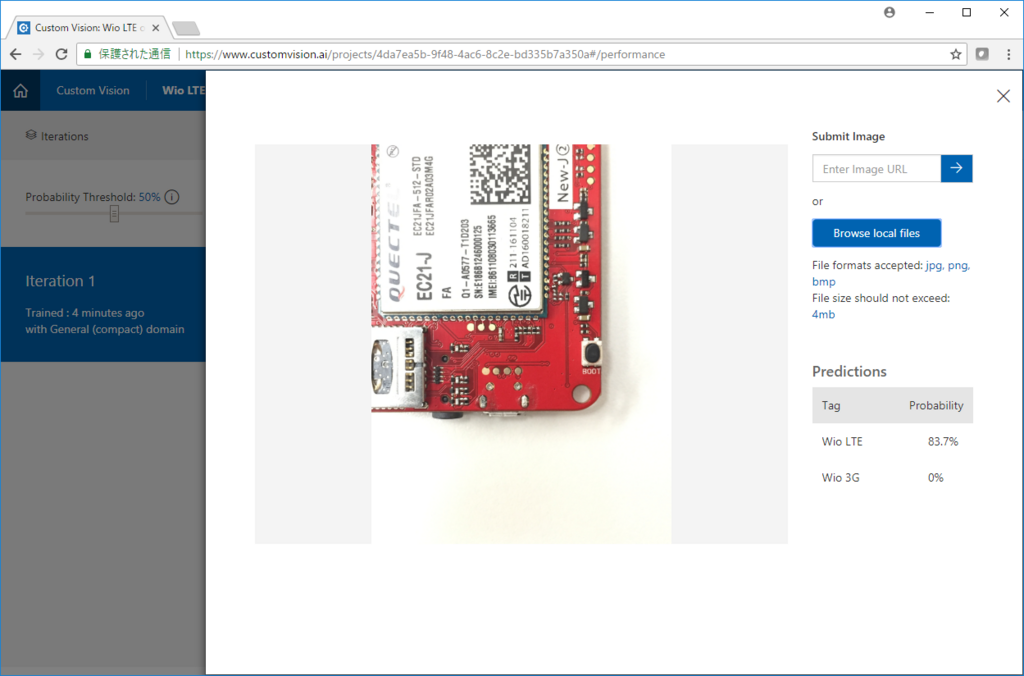
83.7%でWio LTE。ちゃんと動いているようです。
じゃあ、ExportでDockerFileを選んでみます。
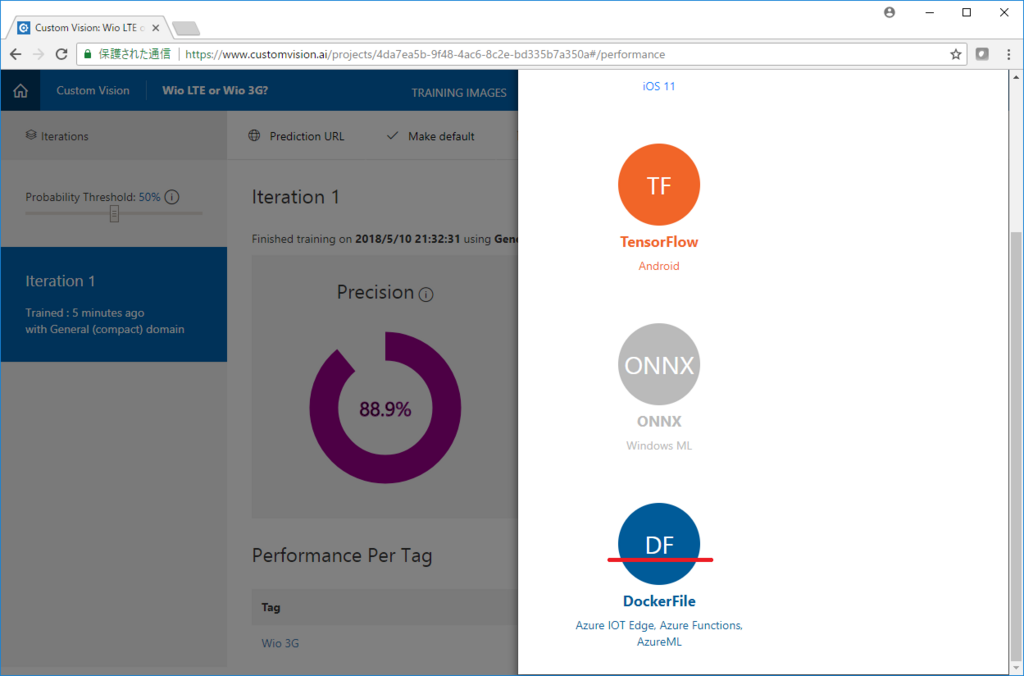
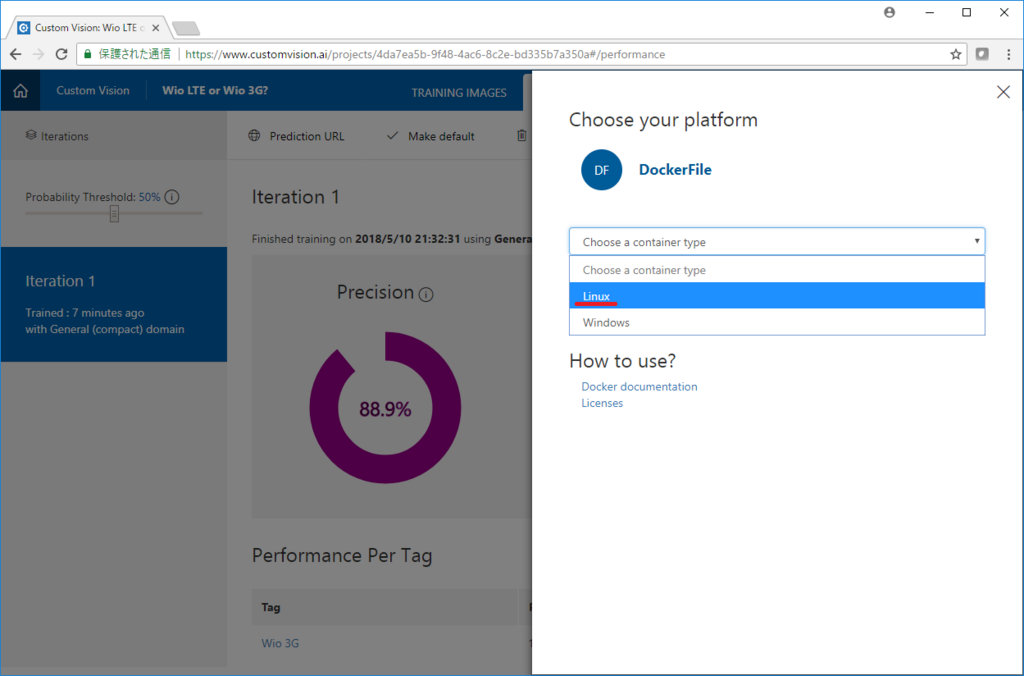
LinuxかWindowsを選ばないといけないようなので、Linuxを選びます。
Dockerfileの入った、zipファイルが取れました。2.57MB。
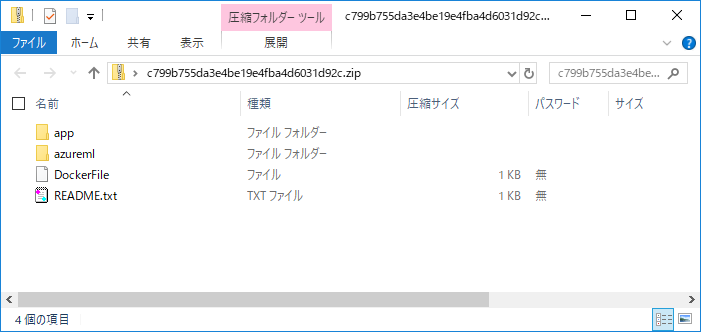
Docker
手元にあるUPボードのUbuntu Server 16.04にzipファイルをコピー、解凍して、docker buildします。
$ docker build -t wio-module .
unable to prepare context: unable to evaluate symlinks in Dockerfile path: lstat /home/ubuntu/cv/Dockerfile: no such file or directory
あれれエラーw
ファイル名を変更して、再トライ。
$ docker build -t wio-module .
Sending build context to Docker daemon  2.938MB
Step 1/6 : FROM python
latest: Pulling from library/python
3d77ce4481b1: Downloading [=>                                                 ]  1.609MB/54.26MB
534514c83d69: Downloading [======>                                            ]  2.364MB/17.58MB
d562b1c3ac3f: Downloading [==>                                                ]  2.199MB/43.25MB
4b85e68dc01d: Waiting
a60ceaabb01c: Waiting
ba209b7a7239: Waiting
235ce1ab7310: Waiting
bd6e9cb6b441: Waiting
今度は問題なく動き出しました。(これどこにフィードバックしたらいいんだろう、、、まぁ、すでに気づいているはずだ。うんうん。)
10分ほどで完了。
結構デカイな。
$ docker images
REPOSITORY          TAG                 IMAGE ID            CREATED             SIZE
wio-module          latest              fcc778e06ba7        8 seconds ago       1.1GB
python              latest              d69bc9d9b016        5 days ago          691MB
では、実行してみましょう。
$ docker run -p 127.0.0.1:80:80 -d wio-module
$ docker ps
CONTAINER ID        IMAGE               COMMAND                  CREATED             STATUS              PORTS                  NAMES
4eeaad81e990        wio-module          "/bin/sh -c 'python …"   8 seconds ago       Up 7 seconds        127.0.0.1:80->80/tcp   trusting_lichterman
$ docker logs 4eeaad81e990
 * Running on http://0.0.0.0:80/ (Press CTRL+C to quit)
動いているっぽい。
適当な画像をcurlでPOSTしてみると、
$ time curl -X POST http://127.0.0.1/image -H "Content-Type: application/octet-stream" --data-binary @IMG_0015.JPG
{
  "created": "2018-05-10T13:09:01.371454",
  "id": "",
  "iteration": "",
  "predictions": [
    {
      "boundingBox": null,
      "probability": 0.9996715784072876,
      "tagId": "",
      "tagName": "Wio LTE"
    }
  ],
  "project": ""
}

real    0m1.364s
user    0m0.012s
sys     0m0.028s
オォー
動いているっぽい。
Dockerコンテナのログは、
$ docker logs 4eeaad81e990
 * Running on http://0.0.0.0:80/ (Press CTRL+C to quit)
2018-05-10 13:07:15.363135: I tensorflow/core/platform/cpu_feature_guard.cc:137] Your CPU supports instructions that this TensorFlow binary was not compiled to use: SSE4.1 SSE4.2
172.17.0.1 - - [10/May/2018 13:07:16] "POST /image HTTP/1.1" 200 -
POST来てますね♪
Dockerコンテナのメモリ使用量は115MBでした。
$ docker stats 4eeaad81e990
CONTAINER ID        NAME                  CPU %               MEM USAGE / LIMIT     MEM %               NET I/O             BLOCK I/O           PIDS
4eeaad81e990        trusting_lichterman   0.03%               114.6MiB / 3.274GiB   3.42%               3.28MB / 12.3kB     0B / 0B             13
感想
- ちょーお手軽簡単に、CustomVisionのローカル実行環境が立てれました。(ただし、Dockerの知識は必要。)
- 中身はTensorFlowなのでGPUを使ってより高速化が可能?(HTTPのオーバーヘッドも結構ありそう?)
Python + Flask + TensorFlowで動いているようですが、詳しくは後日調べたいと思います。