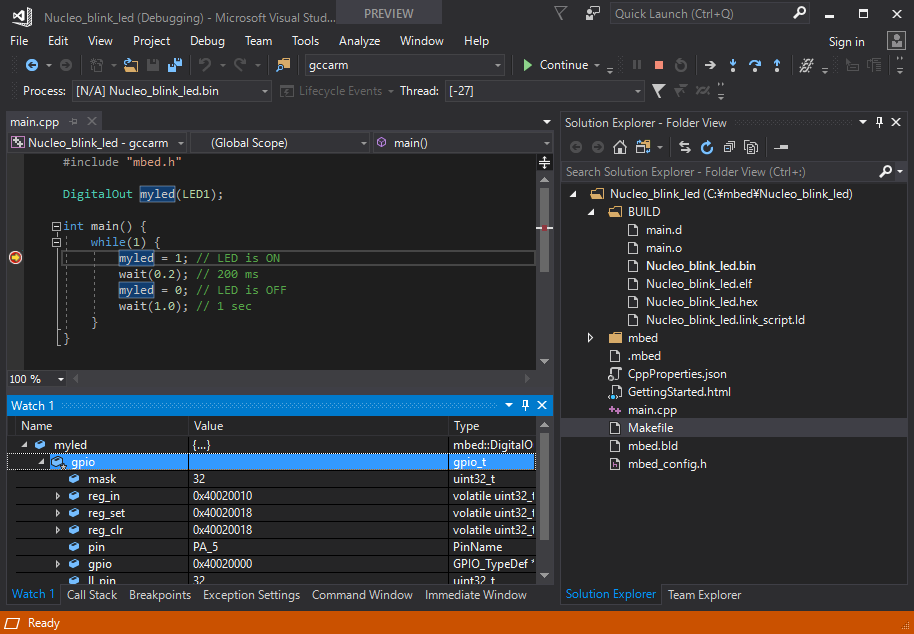
MbedプログラムをVisual Studioでデバッグする
前回に続き、MbedプログラムをVisual Studioでデバッグしてみました。
元ネタはこちらです。 blogs.msdn.microsoft.com
元ネタにあるとおり、デバッグができるのはPreviewのVisual Studio 2017 15.6です。そのため、前回と違ってVisual Studio 2017 Previewを使いました。Visual Studio 2017 Previewはここからダウンロードできます。
- Windows 10 64bit 1709
- Visual Studio 2017 15.6.0 Preview 3.0
- NUCLEO-F401RE
プログラムの作成
前々回と同じです。
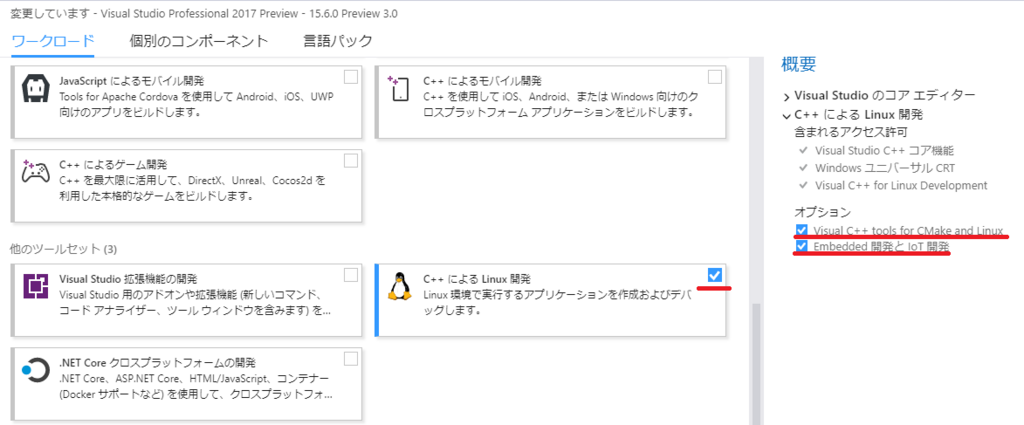
Embedded開発とIoT開発をインストール
Visual Studioに含まれている、Visual C++ tools for CMake and LinuxとEmbedded開発とIoT開発のオプションをインストールしておく必要があります。
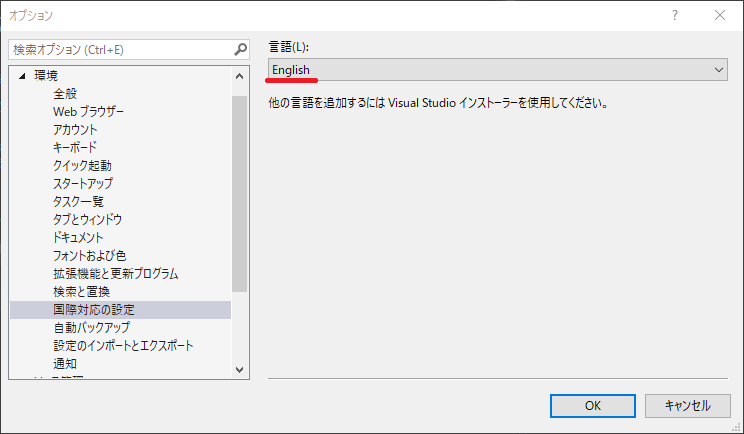
Visual Studioを英語表示にしておく
前回にVisual Studioを英語表示にしておかないとBuild/Cleanのコンテキストメニューが表示されなかったので、早めに英語表示にしておきます。ツール -> オプションの国際対応の設定にある言語をEnglishにして、Visual Studioを再起動してください。
Visual Studioで開く
前々回とほぼ同じです。
File -> Open -> Folderでエクスポートしたプログラムを開いてください。そして、Project -> Edit Settings -> CppProperties.jsonを選んで、自動的に作られたCppProperties.jsonを下記に入れ替えて保存してください。
Project -> Edit Settingsが表示されないときは、main.cppをダブルクリックで開くと表示されます。
CppProperties.json
{
  "configurations": [
    {
      "inheritEnvironments": [
        "gcc-arm"
      ],
      "name": "gccarm",
      "includePath": [
        "${env.INCLUDE}"
      ],
      "defines": [

      ]
    }
  ]
}
Visual Studio 2017 15.5の場合、"gcc-arm"を"gcc_arm"にしないと正常に動作しませんでした。
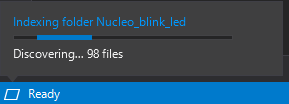
Visual Studio 2017 15.6.0 Preview 3.0の場合、ソースの探索にとても時間がかかるようです。CPU負荷が気になる場合はしばらく放置しましょう。
ビルド
前回と同じです。
Makefileを右クリックしてBuildを選ぶとビルドできます。
デプロイ
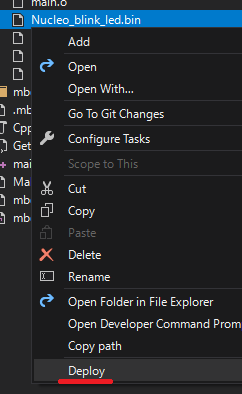
Nucleo_blink_led.binを右クリックしてConfigure Tasksを選んでcopyコマンドをタスクに割り付ければVisual Studioからデプロイできるようになります。
tasks.vs.json
{
  "version": "0.2.1",
  "tasks": [
    {
      "taskName": "Deploy",
      "appliesTo": "BUILD/Nucleo_blink_led.bin",
      "type": "launch",
      "command": "${env.COMSPEC}",
      "args": [
        "copy BUILD\\Nucleo_blink_led.bin D:"
      ]
    }
  ]
}
デバッグ
Visual StudioからMbedのデバッグは、Visual Studio -> GDB Client(arm-none-eabi-gdb) -> GDB Server -> Mbedデバイスという経路で行われます。
GDB Client(arm-none-eabi-gdb)はVisual StudioオプションのEmbedded開発とIoT開発に含まれています。
GDB Serverはデバイスに合わせて別途インストールしておく必要があります。メジャーところはpyOCD、OpenOCDですね。
今回はST-Linkが搭載されているNUCLEOなので、OpenOCDをつかうことにします。
OpenOCD
いろいろなバリエーションのものがネットで配布されていますが、お友達のkekyoさんがビルドしているものがあるので、それを使いましょう。
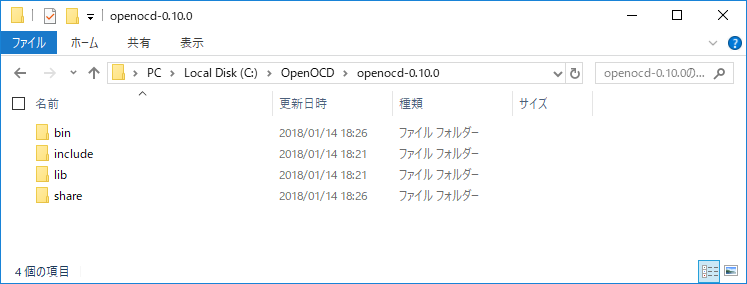
リリース1.0.1にあるopenocd-0.10.0_i686-w64-mingw32_2018-01-14.tar.bz2をC:\OpenOCD\openocd-0.10.0に解凍してください。
Debug and Launch Settings
Nucleo_blink_led.binを右クリックしてDebug and Launch Settingsを選んでください。Debugger選択画面が表示されるので、C/C++ Debug microcontroller(gdbserver)を選択すると、マイコンデバッグ用のlaunch.vs.jsonが作られます。
そして、launch.vs.jsonを修正します。
GDB Server
GDB Serverに関するエントリ(3箇所)を変更してください。debugServerArgsとserverStartedはMbedデバイスによって記入内容が違うことがあるのでちょっと難しいです。特にserverStarted。コマンドプロンプトでGDB Serverを起動して、表示された文言をコピーしましょう。
launch.vs.json(GDB Server関連) - 変更前
"debugServerPath": "path-to-your\\gdbserver.exe",
"debugServerArgs": "-f path-to-your/board.cfg",
"serverStarted": "GDB\\ server\\ started",
launch.vs.json(GDB Server関連) - 変更後
"debugServerPath": "C:\\OpenOCD\\openocd-0.10.0\\bin\\openocd.exe",
"debugServerArgs": "-f board\\st_nucleo_f4.cfg",
"serverStarted": "Info : stm32f4x.cpu: hardware has 6 breakpoints, 4 watchpoints",
GDB Client
GDB Clientに関するエントリ(1箇所)を変更してください。デフォルトの記述のままで正しそうですが、現時点はフルパスを明記しないと動かないようです。
launch.vs.json(GDB Client関連) - 変更前
"miDebuggerPath": "${env.gccpath}\\bin\\arm-none-eabi-gdb.exe",
launch.vs.json(GDB Client関連) - 変更後
"miDebuggerPath": "C:\\Program Files (x86)\\Microsoft Visual Studio\\Preview\\Professional\\Linux\\gcc_arm\\bin\\arm-none-eabi-gdb.exe",
Setup commands
GDBのセットアップコマンドを変更してください。一番最初のエントリはコメントなので削除する必要があります。必要に応じて、追加のコマンドを追記します。
launch.vs.json(セットアップコマンド) - 変更前
      "setupCommands": [
        {
          "text": "Documentation: Learn how to configure embedded debugging",
          "description": "See here for more info http://aka.ms/vsembeddeddebug",
          "ignoreFailures": true
        },
        {
          "text": "-environment-cd ${workspaceRoot}/BUILD"
        },
        {
          "text": "-file-exec-and-symbols ${workspaceRootFolderName}.elf",
          "description": "load file",
          "ignoreFailures": false
        },
        {
          "text": "-enable-pretty-printing",
          "ignoreFailures": true
        }
launch.vs.json(セットアップコマンド) - 変更後
      "setupCommands": [
        {
          "text": "-environment-cd ${workspaceRoot}/BUILD"
        },
        {
          "text": "-file-exec-and-symbols ${workspaceRootFolderName}.elf",
          "description": "load file",
          "ignoreFailures": false
        },
        {
          "text": "-enable-pretty-printing",
          "ignoreFailures": true
        },
        {
          "text": "monitor reset halt",
          "ignoreFailures": true
        },
        {
          "text": "monitor reset init",
          "ignoreFailures": true
        }
デバッグ情報の生成
MbedオンラインコンパイラからエクスポートしたMakefileだと、コンパイル時にデバッグ情報が付加されていません。Makefile内のCCとCPPに'-g'を追加、'-Os'を'-O0'に変更してリビルド、デプロイしてください。リビルドですが、Makefile修正だとリビルドされないのでCleanしてBuildしてください。
Makefile(一部) - 変更前
CC      = 'arm-none-eabi-gcc' '-std=gnu99' '-c' '-Wall' '-Wextra' '-Wno-unused-parameter' '-Wno-missing-field-initializers' '-fmessage-length=0' '-fno-exceptions' '-fno-builtin' '-ffunction-sections' '-fdata-sections' '-funsigned-char' '-MMD' '-fno-delete-null-pointer-checks' '-fomit-frame-pointer' '-Os' '-mcpu=cortex-m4' '-mthumb' '-mfpu=fpv4-sp-d16' '-mfloat-abi=softfp'
CPP     = 'arm-none-eabi-g++' '-std=gnu++98' '-fno-rtti' '-Wvla' '-c' '-Wall' '-Wextra' '-Wno-unused-parameter' '-Wno-missing-field-initializers' '-fmessage-length=0' '-fno-exceptions' '-fno-builtin' '-ffunction-sections' '-fdata-sections' '-funsigned-char' '-MMD' '-fno-delete-null-pointer-checks' '-fomit-frame-pointer' '-Os' '-mcpu=cortex-m4' '-mthumb' '-mfpu=fpv4-sp-d16' '-mfloat-abi=softfp'
Makefile(一部) - 変更後
CC      = 'arm-none-eabi-gcc' '-g' '-std=gnu99' '-c' '-Wall' '-Wextra' '-Wno-unused-parameter' '-Wno-missing-field-initializers' '-fmessage-length=0' '-fno-exceptions' '-fno-builtin' '-ffunction-sections' '-fdata-sections' '-funsigned-char' '-MMD' '-fno-delete-null-pointer-checks' '-fomit-frame-pointer' '-O0' '-mcpu=cortex-m4' '-mthumb' '-mfpu=fpv4-sp-d16' '-mfloat-abi=softfp'
CPP     = 'arm-none-eabi-g++' '-g' '-std=gnu++98' '-fno-rtti' '-Wvla' '-c' '-Wall' '-Wextra' '-Wno-unused-parameter' '-Wno-missing-field-initializers' '-fmessage-length=0' '-fno-exceptions' '-fno-builtin' '-ffunction-sections' '-fdata-sections' '-funsigned-char' '-MMD' '-fno-delete-null-pointer-checks' '-fomit-frame-pointer' '-O0' '-mcpu=cortex-m4' '-mthumb' '-mfpu=fpv4-sp-d16' '-mfloat-abi=softfp'
デバッグ
Select Start ItemをNucleo_blink_led.binにしてデバッグ実行すればOKです。

が!デプロイ直後だとうまくブレークできないときがあるようです(あります)。かなり高い確率で。そんなときは、デバッグ停止して、NUCLEOのRESETボタンをクリック、再度、デバッグ実行するとうまく動くようです。思うようにブレークされないときはRESETしましょう(笑
